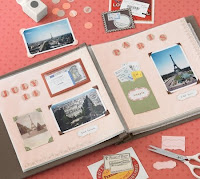
”The best memories for future generations”.

Materials
1. Acid free album pages
2. Acid-free page protective sleeves
3. Printed decorative sheets
4. Printed photo-safe decorative stickers or decorative dies
5. Acid-free pen; glue stick; and adhesive photo mounts
1. Acid free album pages
2. Acid-free page protective sleeves
3. Printed decorative sheets
4. Printed photo-safe decorative stickers or decorative dies
5. Acid-free pen; glue stick; and adhesive photo mounts
Idea planning and selection
Step 1. Gather your favorite photo from old albums and shoebox storage. Put them in rough groups by event, time, or theme.
Step 1. Gather your favorite photo from old albums and shoebox storage. Put them in rough groups by event, time, or theme.
Mood and paper
Step 2. Look for dominant color a selection of background patterns and colors.
Step 2. Look for dominant color a selection of background patterns and colors.
Cutting and style
Step 3. Crop for impact!
Use available stencil for hearts, stars, oval, circles and many other shapes. Be inventive! Try using cookie cutters, kitchen glasses, bowls, or even try cutting your own stencils from cardboard or plastic coffe-can lids.
Step 3. Crop for impact!
Use available stencil for hearts, stars, oval, circles and many other shapes. Be inventive! Try using cookie cutters, kitchen glasses, bowls, or even try cutting your own stencils from cardboard or plastic coffe-can lids.
Placement, Framing and Decoration
Step 4. Use your imagination!
Get really creative! Crop photos to fit in odd shapes like a bucket, a wagon shape, inside bicycle wheels, car windows. Crop and shape background paper to add color to a unique and attractive photo frame.
Step 4. Use your imagination!
Get really creative! Crop photos to fit in odd shapes like a bucket, a wagon shape, inside bicycle wheels, car windows. Crop and shape background paper to add color to a unique and attractive photo frame.
Words and Letters
Step 5. Finally, add words and captions, with large decorative letters, with verse, o simple notes.
Step 5. Finally, add words and captions, with large decorative letters, with verse, o simple notes.

No comments:
Post a Comment